Contents:
Introduction
News blog
What is Servoy?
Getting Started
Comparison Servoy/VFP
Performance
How-To's
Code Reference
VFP2Servoy Toolkit
Contact / feedback
|
How to create a data-entry form (field style)
Creating a form with multiple data-entry controls is very much like creating a data-entry-form (grid style) and
also very much like the same process in Visual FoxPro.
This examples assumes you already did the previous walkthroughs and have created a project. For the datasource we will use the
example_data database but you can also use your own of course.
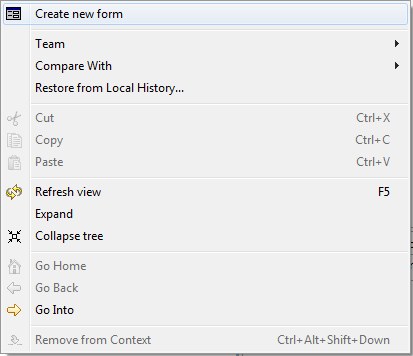
- Right-click the Forms entry in the Solution Explorer
- select Create new Form
The New Form dialog opens:
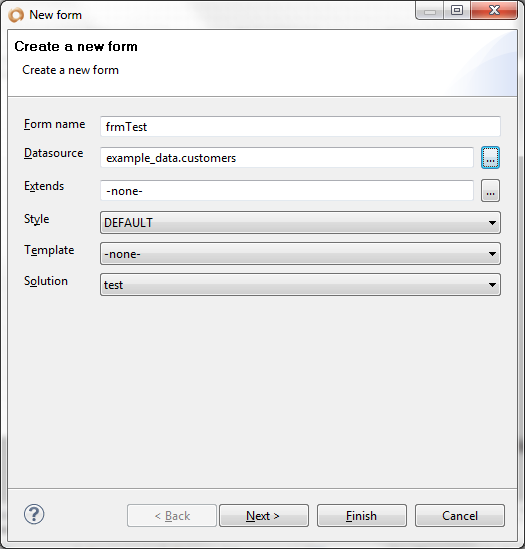
- Type a formname in the Form name field: frmDetail
- Press the button behind the Datasource field
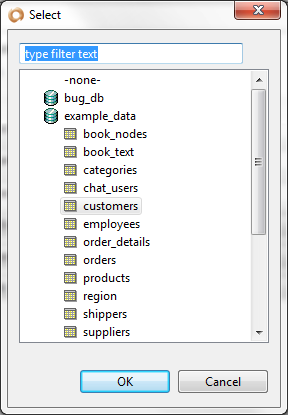
- Expand the database you want to use
- Select the table you want to use
- Click the Ok button
If you chose the customers table from the example_data database then the Datasource field will now contain example_data.customers.
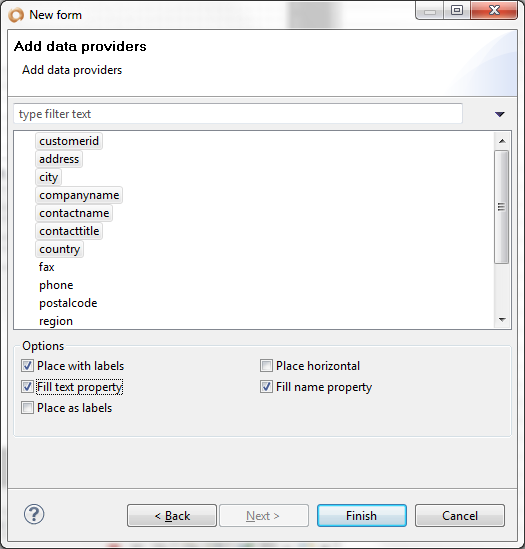
In this screen we will select the columns/fields (called data providers here) that we want to include in our form.
- Select the columns/fields by holding down the Shift-key and clicking them with the mouse
- Make sure the checkboxes match the settings in the screenshot above
- Press the Finish button
These checkboxes can be rather confusing. This is what they do:
- Place with labels: When checked adds a label control for each field (Servoy: data provider)
- Place horizontal: When checked adds the fields to the form in grid style, otherwise the fields will be stacked vertically
- Fill text property: When checked fills the titleText property of the textbox control
- Fill name property: When checked fills the name property of the textbox control
- Place as labels: When checked labels are used instead of text controls (readonly)
Note that when a grid style form is created the labels are positioned above the textbox controls and in
a field style form the labels are positioned to the left of the textbox controls. As a rule of thumb I check the first four
and only toggle "Place horizontal" depending on whether I want a grid style form or a field style form.
If you ever want to change a form from grid style (Servoy calls this ListView) to field style (Servoy calls this Record View) you can
do so by changing the View property.

Enough already, let's run the form.
Smart Client
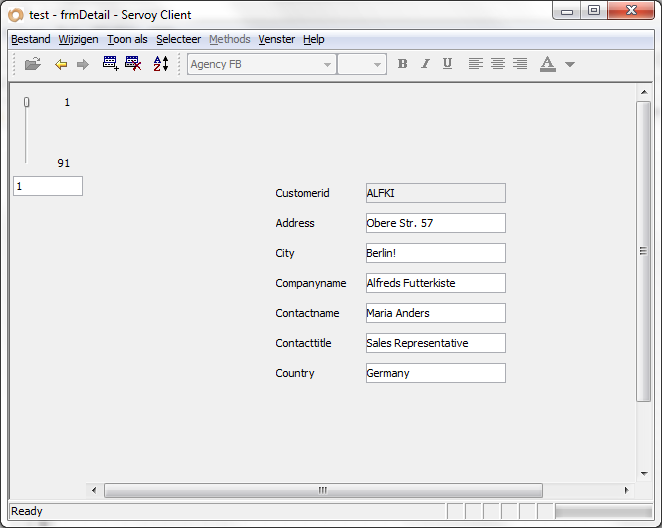
As you can see a navigator control is automatically added to the form. If you want to turn it off locate the navigator form property
and set it to - none -.
Note: When your application is started the main form is presented (usually the first form that was added to the Solution just as is the case in VFP).
From the Smart Client you can select Window from the menu and then activate any other form (even if it was not yet opened).
In the webclient however there is no menu. You can solve this in several ways. The easiest is to start the webclient and to right-click
the form you want to activate and select Open form in client. This also works for the smart client.
If you want to change the default startup form then select the <Solution> node (test in our case) from the Solution Explorer.
In the property window you will find the property firstForm. Click it to set it. A form selection dialog will show from which you
choose a form to set as the startup form.
Web Client

|
External resources:
 vfp plugin vfp plugin
ServoyWorld 2012 pics
Official Servoy website
Ken Levy on Servoy
Servoy info
Servoy Forum
Servoy Documentation
|